Detailed FAQ for Unwrapping of tokens
1. What is the difference between WSoulX and SoulX?
WSoulX is a wrapped version of the SoulX user needs to go through a vesting schedule to Unwrap their WSoulX token.
2. When can a user unwrap WSoulX to SoulX?
After the launch of token soulverse will provide a platform to unwrap the tokens.
3. Where can the user unwrap the tokens?
On soulverse Vesting page user will unwrap the tokens
4. How many tokens can I unwrap ?
As per vesting schedule sheet user can validate the tokens available to unwrap
5. How to unwrap WSoulX?
• Connect your wallet with vesting dashboard and make sure connect with same wallet from which you have purchased the tokens
• On the dashboard there will be 4 parameters user can see
a. Balance : The WSoulX tokens currently user have in their wallet
b. Staked Tokens : The no. of tokens user have staked with our staking platform
c. Eligible to unwrap : As per vesting schedule the eligible tokens user can unwrap
d. Available to unwrap : The available tokens in user’s wallet with eligibility are shown in Available to unwrap
Now users can only unwrap tokens as shown in the Available to unwrap section. If users try to put more value than Available to unwrap, the application will give an alert.
Write the value inside the input box and click on the UNWRAP button. Now your browser wallet will pop up and ask to sign the transaction, confirm the transaction and your tokens are unwrapped.
6. Where can I find my unwrap tokens ?
Import this 0x80150d2623b82582BC7dd7826d846375A3C3A456 contract address into your wallet now you can see the SoulX token Inside your wallet
7. Where can I find all my transactions?
Users can navigate to transactions menu given in the navigation bar to see there all transactions, user can click on transaction hash to navigate to the polygon scanner to see there transactions.if in can Tnx icon shows in yellow color it means it is in pending state wait for few seconds once it gets green it mean now the transaction got successful
8. How does this unwrapping work?
Unwrapping of tokens is simply here user is converting there WSoulX to SoulX
9. Unable to process the transaction, with error insufficient funds?
If the transaction fails with error insufficient funds , please check if there are enough Matic/Pol in your associated wallet to cover the gas fees.
General FAQ
1. What entity is the issuer of the tokens?
a. Nexium Labs Ltd.
2. What will the fund be used for?
a. Funds are going to be used for product development, operations, and R&D.
3.Schedule of token sale and price of token.
a. Include the table.
4. When and how are the tokens transferred to the investors who participated in the ICO? Who is responsible for this?
a. The tokens will be transferred to the investor as per the vesting schedule given below. Nexium Labs is responsible for transferring the tokens to the investors.
i. Include the table.
5. What kind of proof of ownership of tokens do the investors receive?
a. Investors receive a SAFT (Simple Agreement for Future Tokens) at the time of purchase of tokens that they can review and download as a PDF.
6. Can tokens be acquired from somewhere after the ICO?
a. Yes, from any centralized (CEX) or decentralized (DEX) exchanges we partner with to list our Token.
7. Will the tokens become subject to trading somewhere?
a. Yes, on both central and decentralized exchanges.
8. How to create a crypto wallet?
a. Soulverse is currently set up to connect with MetaMask. You can follow the steps below to create a wallet (as a chrome extension or an app in your cell phone).
i. Chrome extension:
1. Download MetaMask. The first thing you'll want to do is visit https://metamask.io/ and click Download.
2. Create your Wallet. Now that you installed MetaMask, you have the browser extension.
3. Backup and Verify Your Secret Backup Phrase. This is a very important step. We recommend you write down the phrase and store it in a safe place rather than take a screenshot or store it in your cell phone.
4. Setup Polygon chain, if it's not already set up
a. Visit ChainList (www.chainlist.org)
b. Search networks for "Polygon" and click Add to MetaMask for Polygon Mainnet (Chain ID 137)
c. Approve prompt to add a new network in your MetaMask extension.
ii. Cell Phone app:
1. Go to the Apple Store or Google Playstore and download the Metamask app.
2. Create a new account
3. Backup and Verify Your Secret Backup Phrase. This is a very important step. We recommend you write down the phrase and store it in a safe place rather than take a screenshot or store it in your cell phone. t
4. Setup Polygon chain, if it's not already set up
a. Visit ChainList (www.chainlist.org)
b. Search networks for "Polygon" and click Add to MetaMask for Polygon Mainnet (Chain ID 137)
c. Approve prompt to add a new network in your MetaMask extension.
9. Which cryptocurrencies can I use to buy SoulCoin ($SouX)?
a. Ethereum (ETH)
b. Matic (ETH)
c. Tether (USDT)
10. What will I receive in return?
a. Based on the phase of the token sale as per the schedule below, you will receive tokens for the amount you invest at the rate indicated.
i. Private sale price of $SoulX till November 13, 2023: $0.029
ii. ICO sale price of $SoulX from Nov 14, 2023 - Mar 2, 2024: $0.10
11. What is the main sale price? (Launch price on DEXs and CEXs)
a. The launch price of $SoulX is $0.20 (Dollar twenty cents)
A quick guide to install metamask
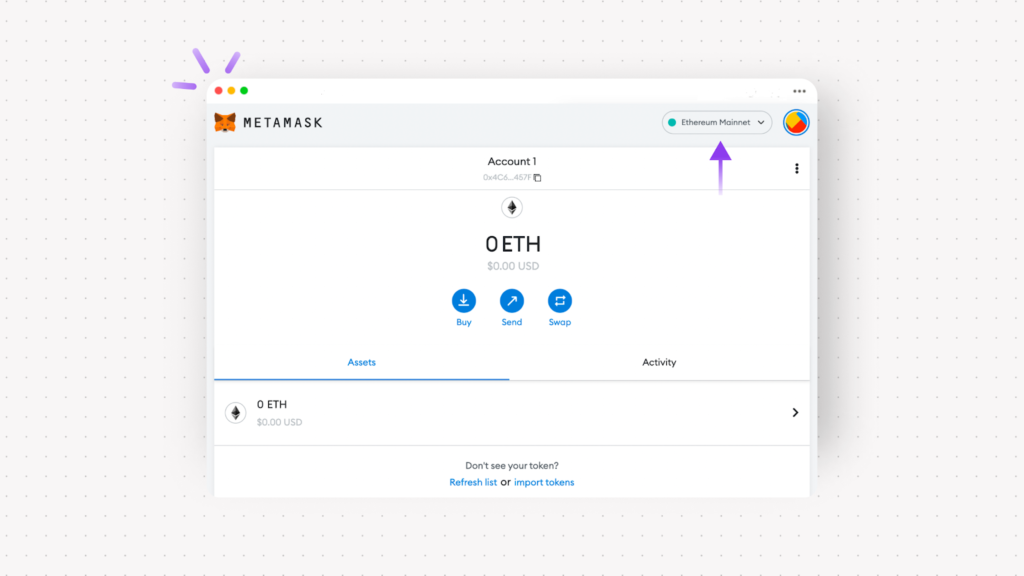
Connecting to Polygon
MetaMask is set up for use on Ethereum by default. You will need to connect the Polygon network first.
Connect Manually
1. On mobile, click the hamburger icon in the top left, go to Settings and down to Networks. On the browser, the network selection window is usually in the top right.
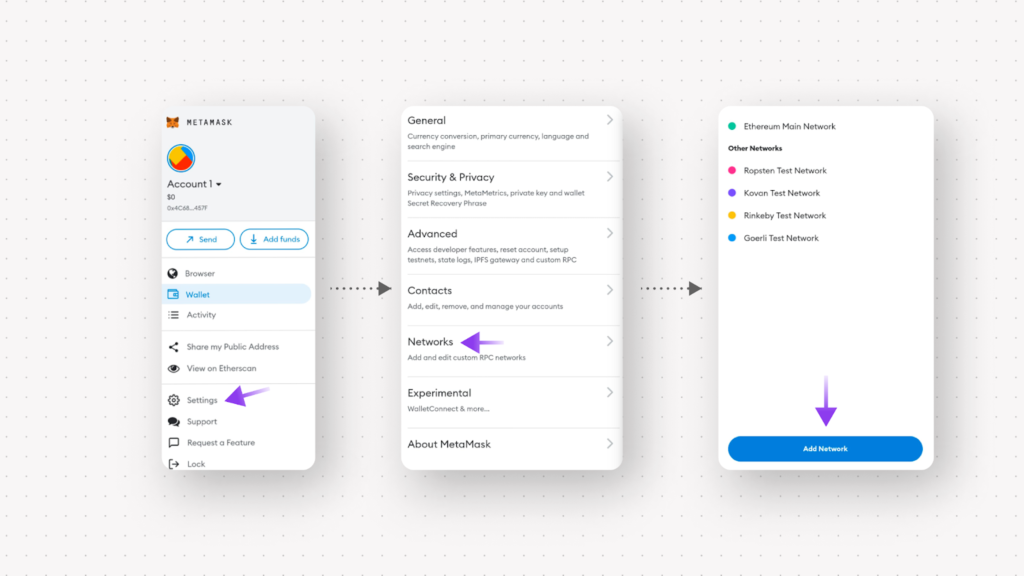
On the desktop, simply click the 'Add network' button under the drop-down network menu at the top right corner. Refer to the below screenshot:
2. Click 'Add network'and fill in the following information:
3. Click
4. Welcome to Polygon!
Connect Automatically
1. On polygonscan, go to the bottom of the page and click the "Add Polygon Network" button.
2. A MetaMask Notification will appear. Click “Approve” to proceed.
2. A MetaMask Notification will appear. Click “Approve” to proceed.
3. In the network dropdown list, you'll be taken straight to Polygon's Mainnet.
4. Done!
Adding Assets
You will need to manually add Polygon tokens other than MATIC if you want them to appear in the wallet UI. Be aware that tokens that haven't been imported yet can still be sent to your wallet's address:
1. Whether you are on the browser or mobile app, there is a link to “Import Tokens” on the bottom of the screen.
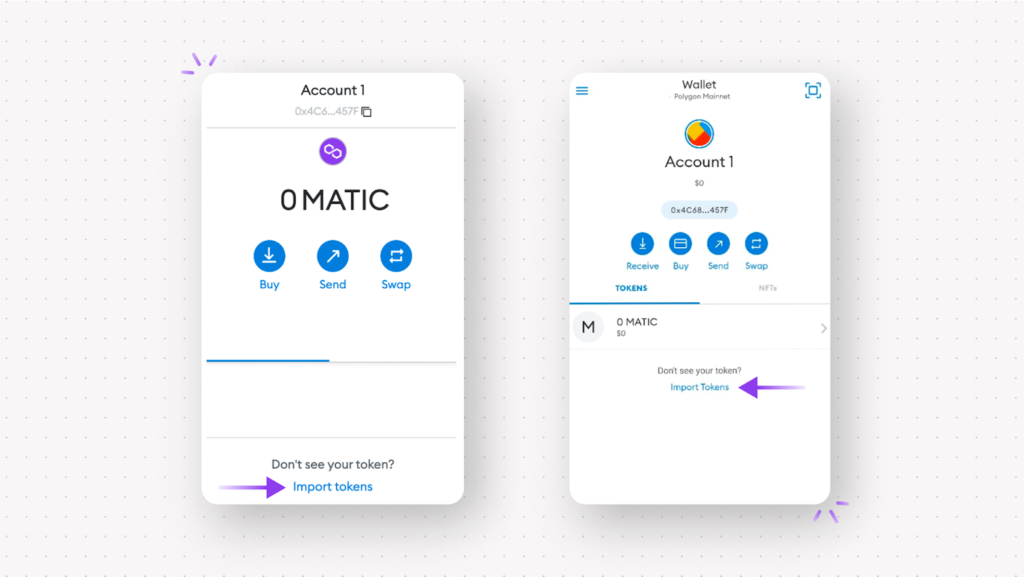
2.You can use the search field to find your token and import it.
3. If you are the hands-on type or the token you are adding is new or exotic, there is the manual way. On the Import Tokens page of the wallet, go to Custom Token.
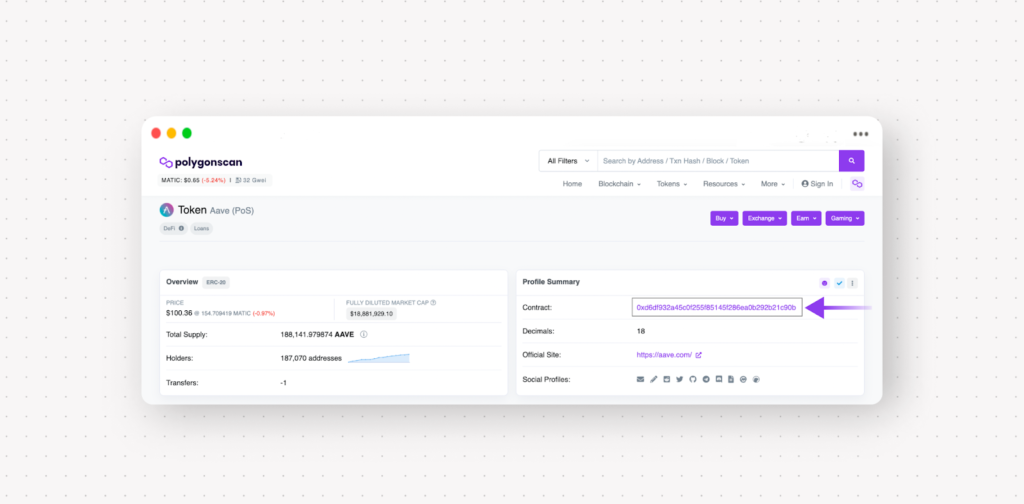
4. You will need to find the Token Contract Address. The best way is to follow links from the project’s official site to polygonscan and look at the Contract field. You can also use a reputable price source like CoinMarketCap or CoinGecko to look up your token and change the network to Polygon in the Contract section of the description.
5. MetaMask should automatically fill in the rest of the information after you've copied the token's contract address into the form. If it doesn’t, give it a name and the number of digits after the decimal point you want to be displayed (“2” to see “$15.99”) and click Add Custom Token.
6. You should now be able to see the tokens' balance in your wallet. Before you set off traipsing through Polygon wonderland, make sure you have some MATIC tokens on hand to pay for gas.